5 Tips for Styling Your Wedding Stationery
There's nothing better than that moment when all of the pieces in a suite are printed and in your hands. It's so fun to see it all in real life instead of your computer screen. Styling them becomes this relaxing process (for me! ha) at the end of all the craziness and I love getting to show it all of to the (internet) world. Lining up all those lines and adding in cuttings from the yard, ah... i love it. So I wanted to share a few of my tips for styling your own if you are ever motivated to do so;)

These are a few of the basic steps I work through every time I pull a new suite out onto the table. Obviously it also involves your taste and style, but if I had to explain what works majority of the time, this would be it! To start...
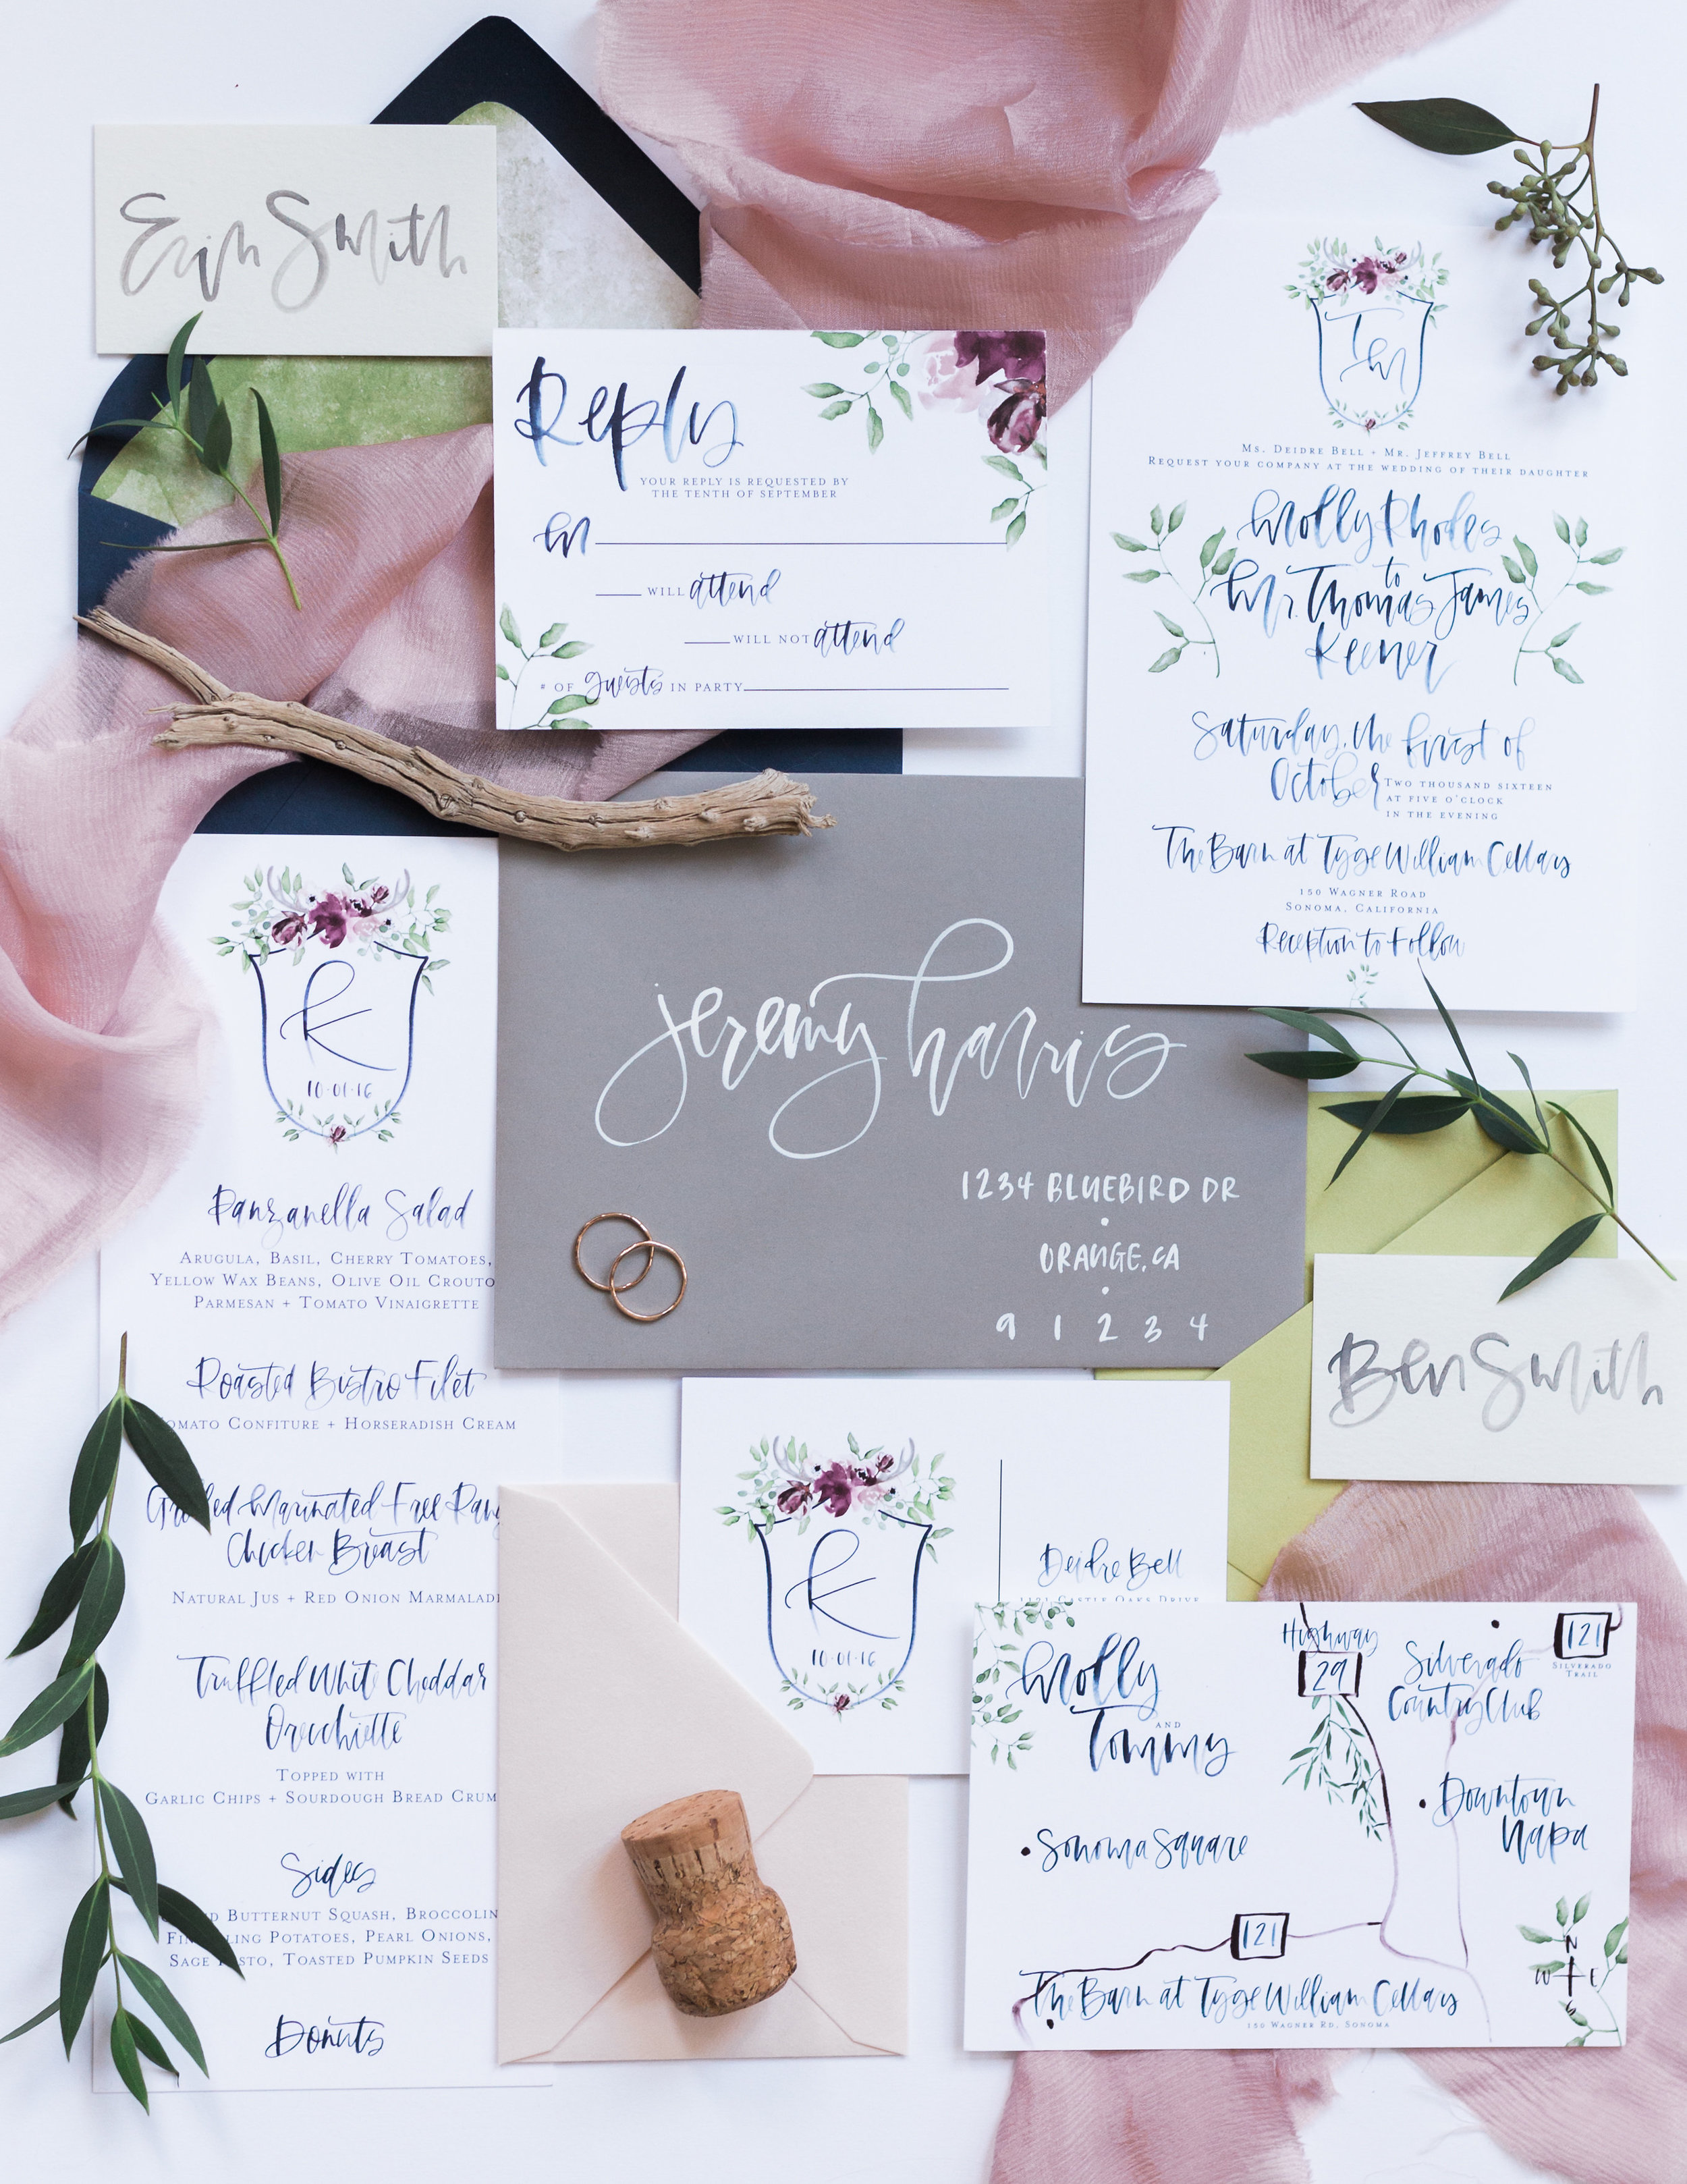
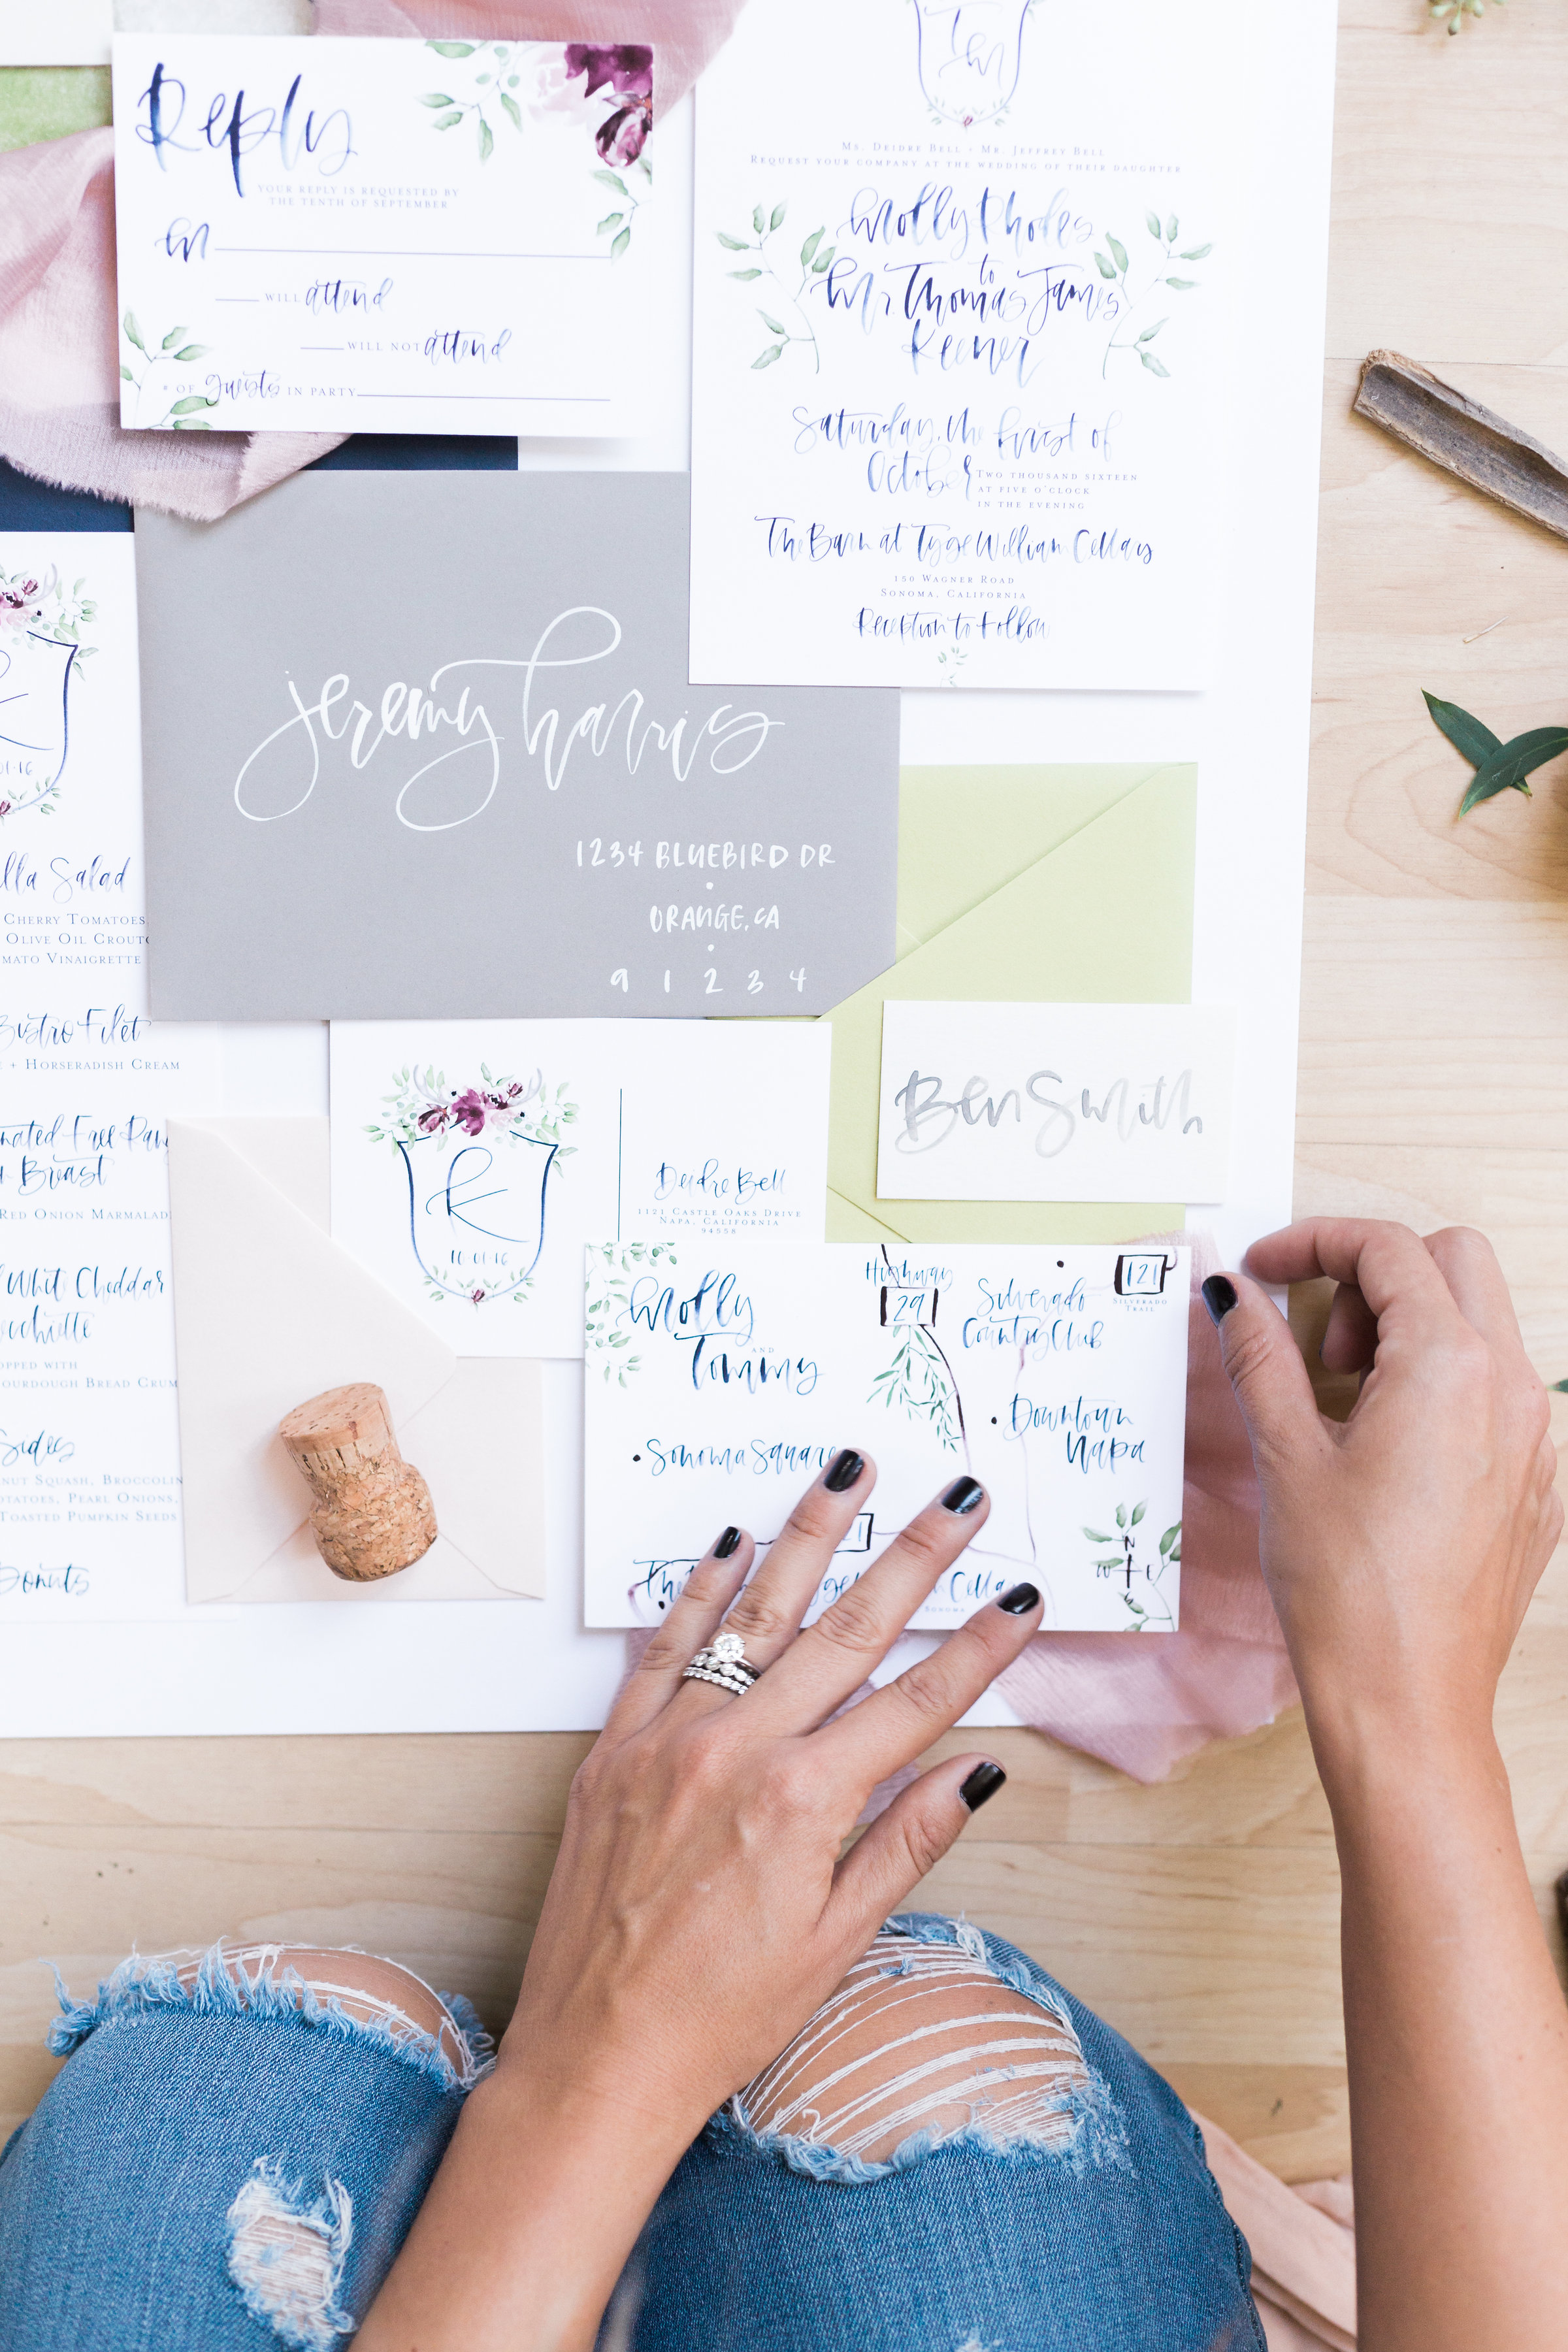
1. Pull the main pieces you will be styling
This is (obviously) the invitation suite, but also remember the pieces that will round it out. That can be an envelope liner, place cards, coordinating envelopes or other pieces you may have designed as day of materials. Many times I switch out what the client actually used for something that ties back, color or style wise, to my site or brand. Since these images will be living on your feed as well as attracting new clients, I think it only makes sense for you to make those changes to make the entire suite a great fit.

2. I always start with the largest items. Usually an envelope that will lie open with a liner (as these will be covered with other layers) and longer/bulky items. These pieces usually start to create the "border" of your image; the lines that you won't style outside of when layering in more pieces.
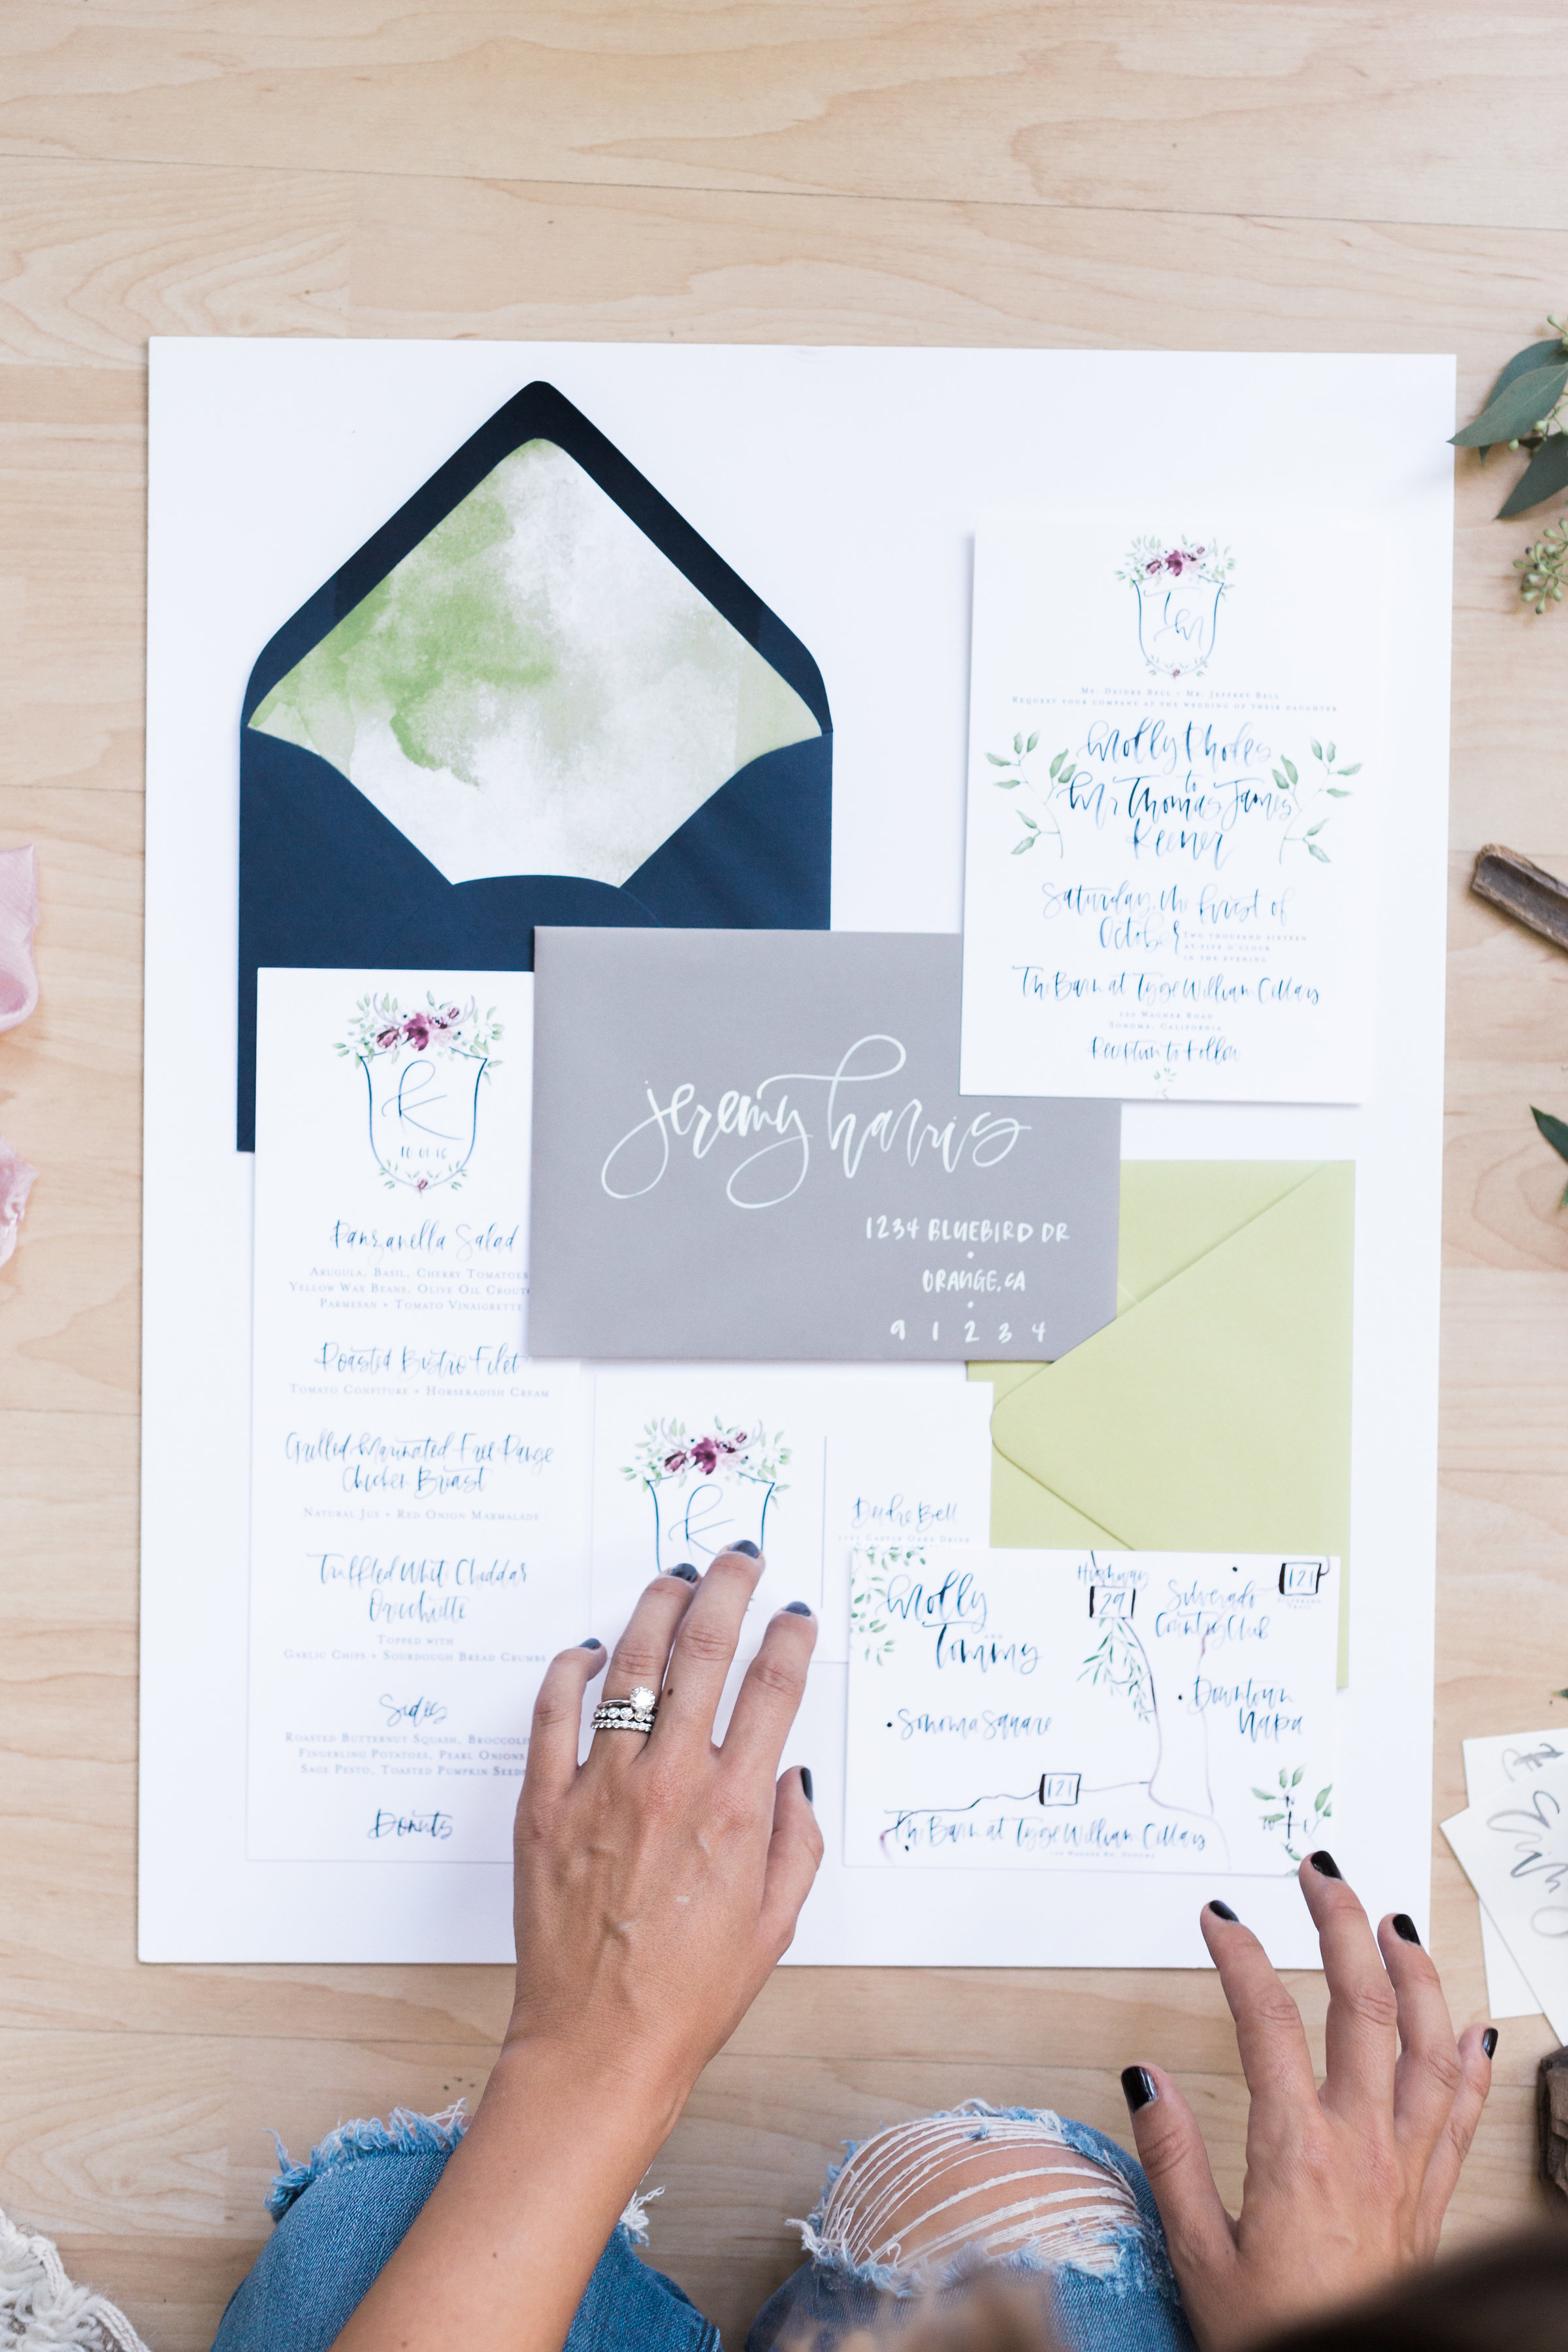
3. Next I finish the "border" by layering in the other pieces of the suite. So you can see how the menu, map, invite and envelope create 4 corners and an imaginary rectangle I will work inside of later. Since I had a lot of white, I balanced out the heavy navy envelope with more color in a diagonal line moving your eye to the bottom right corner.
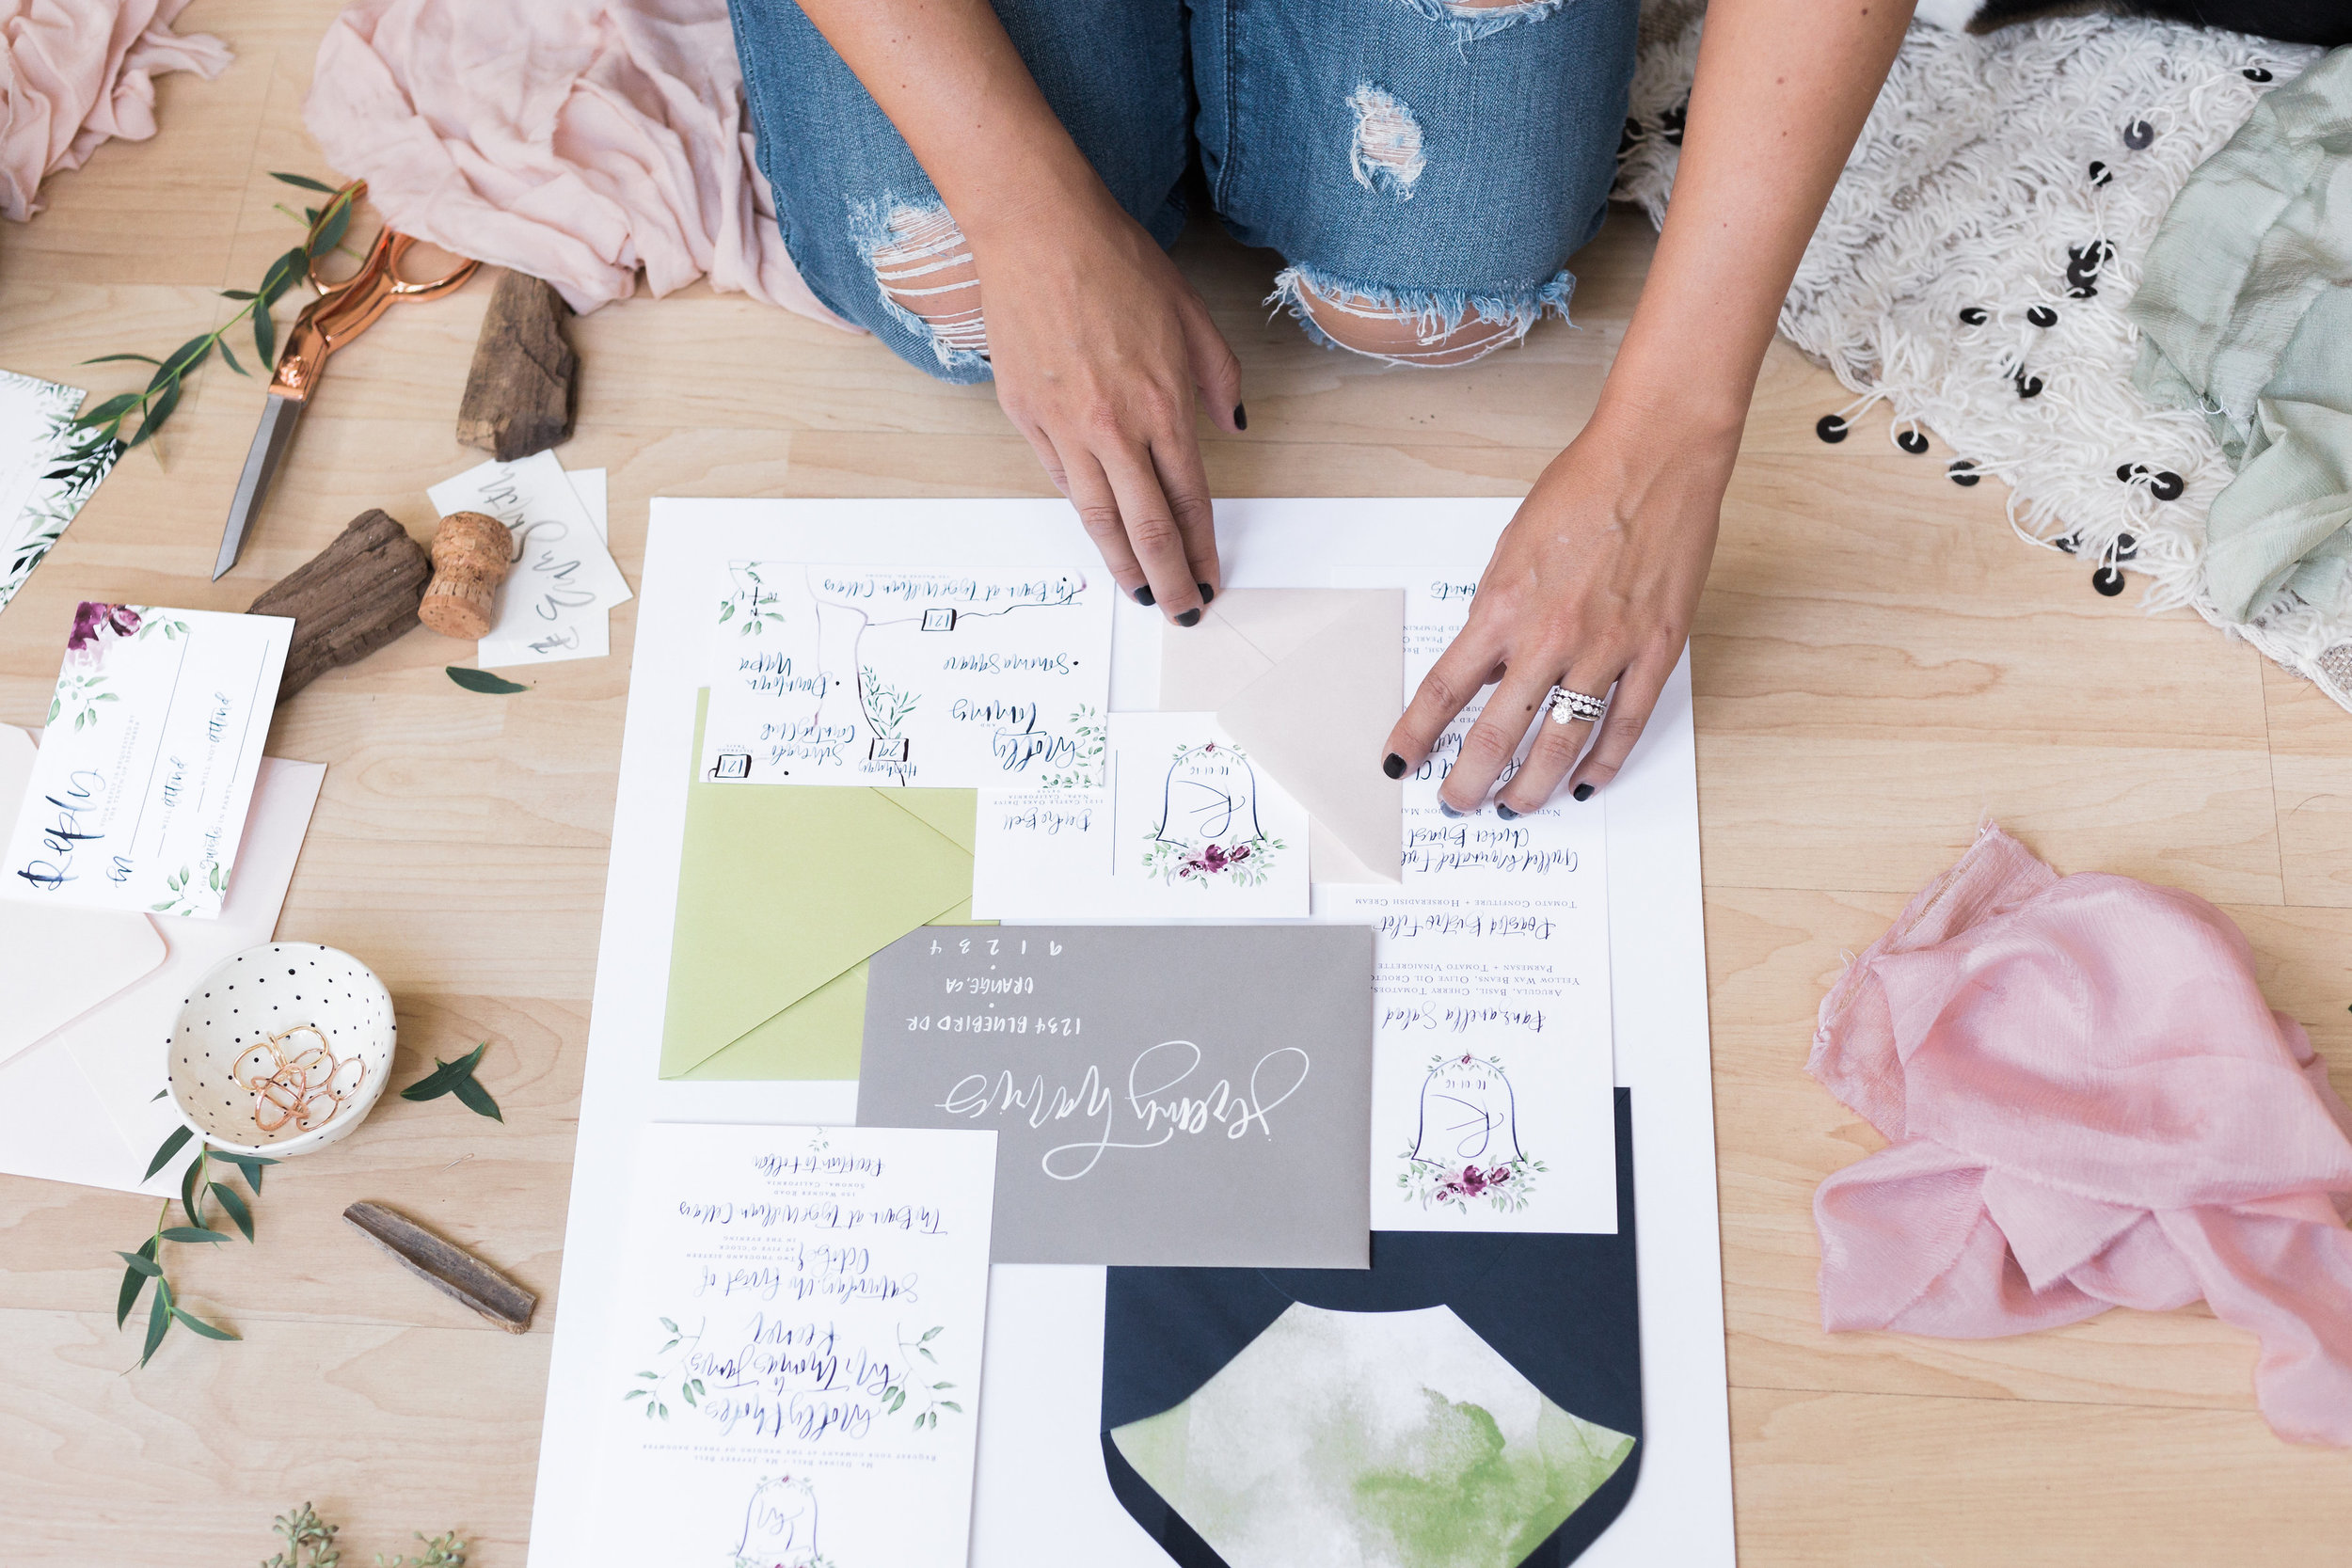
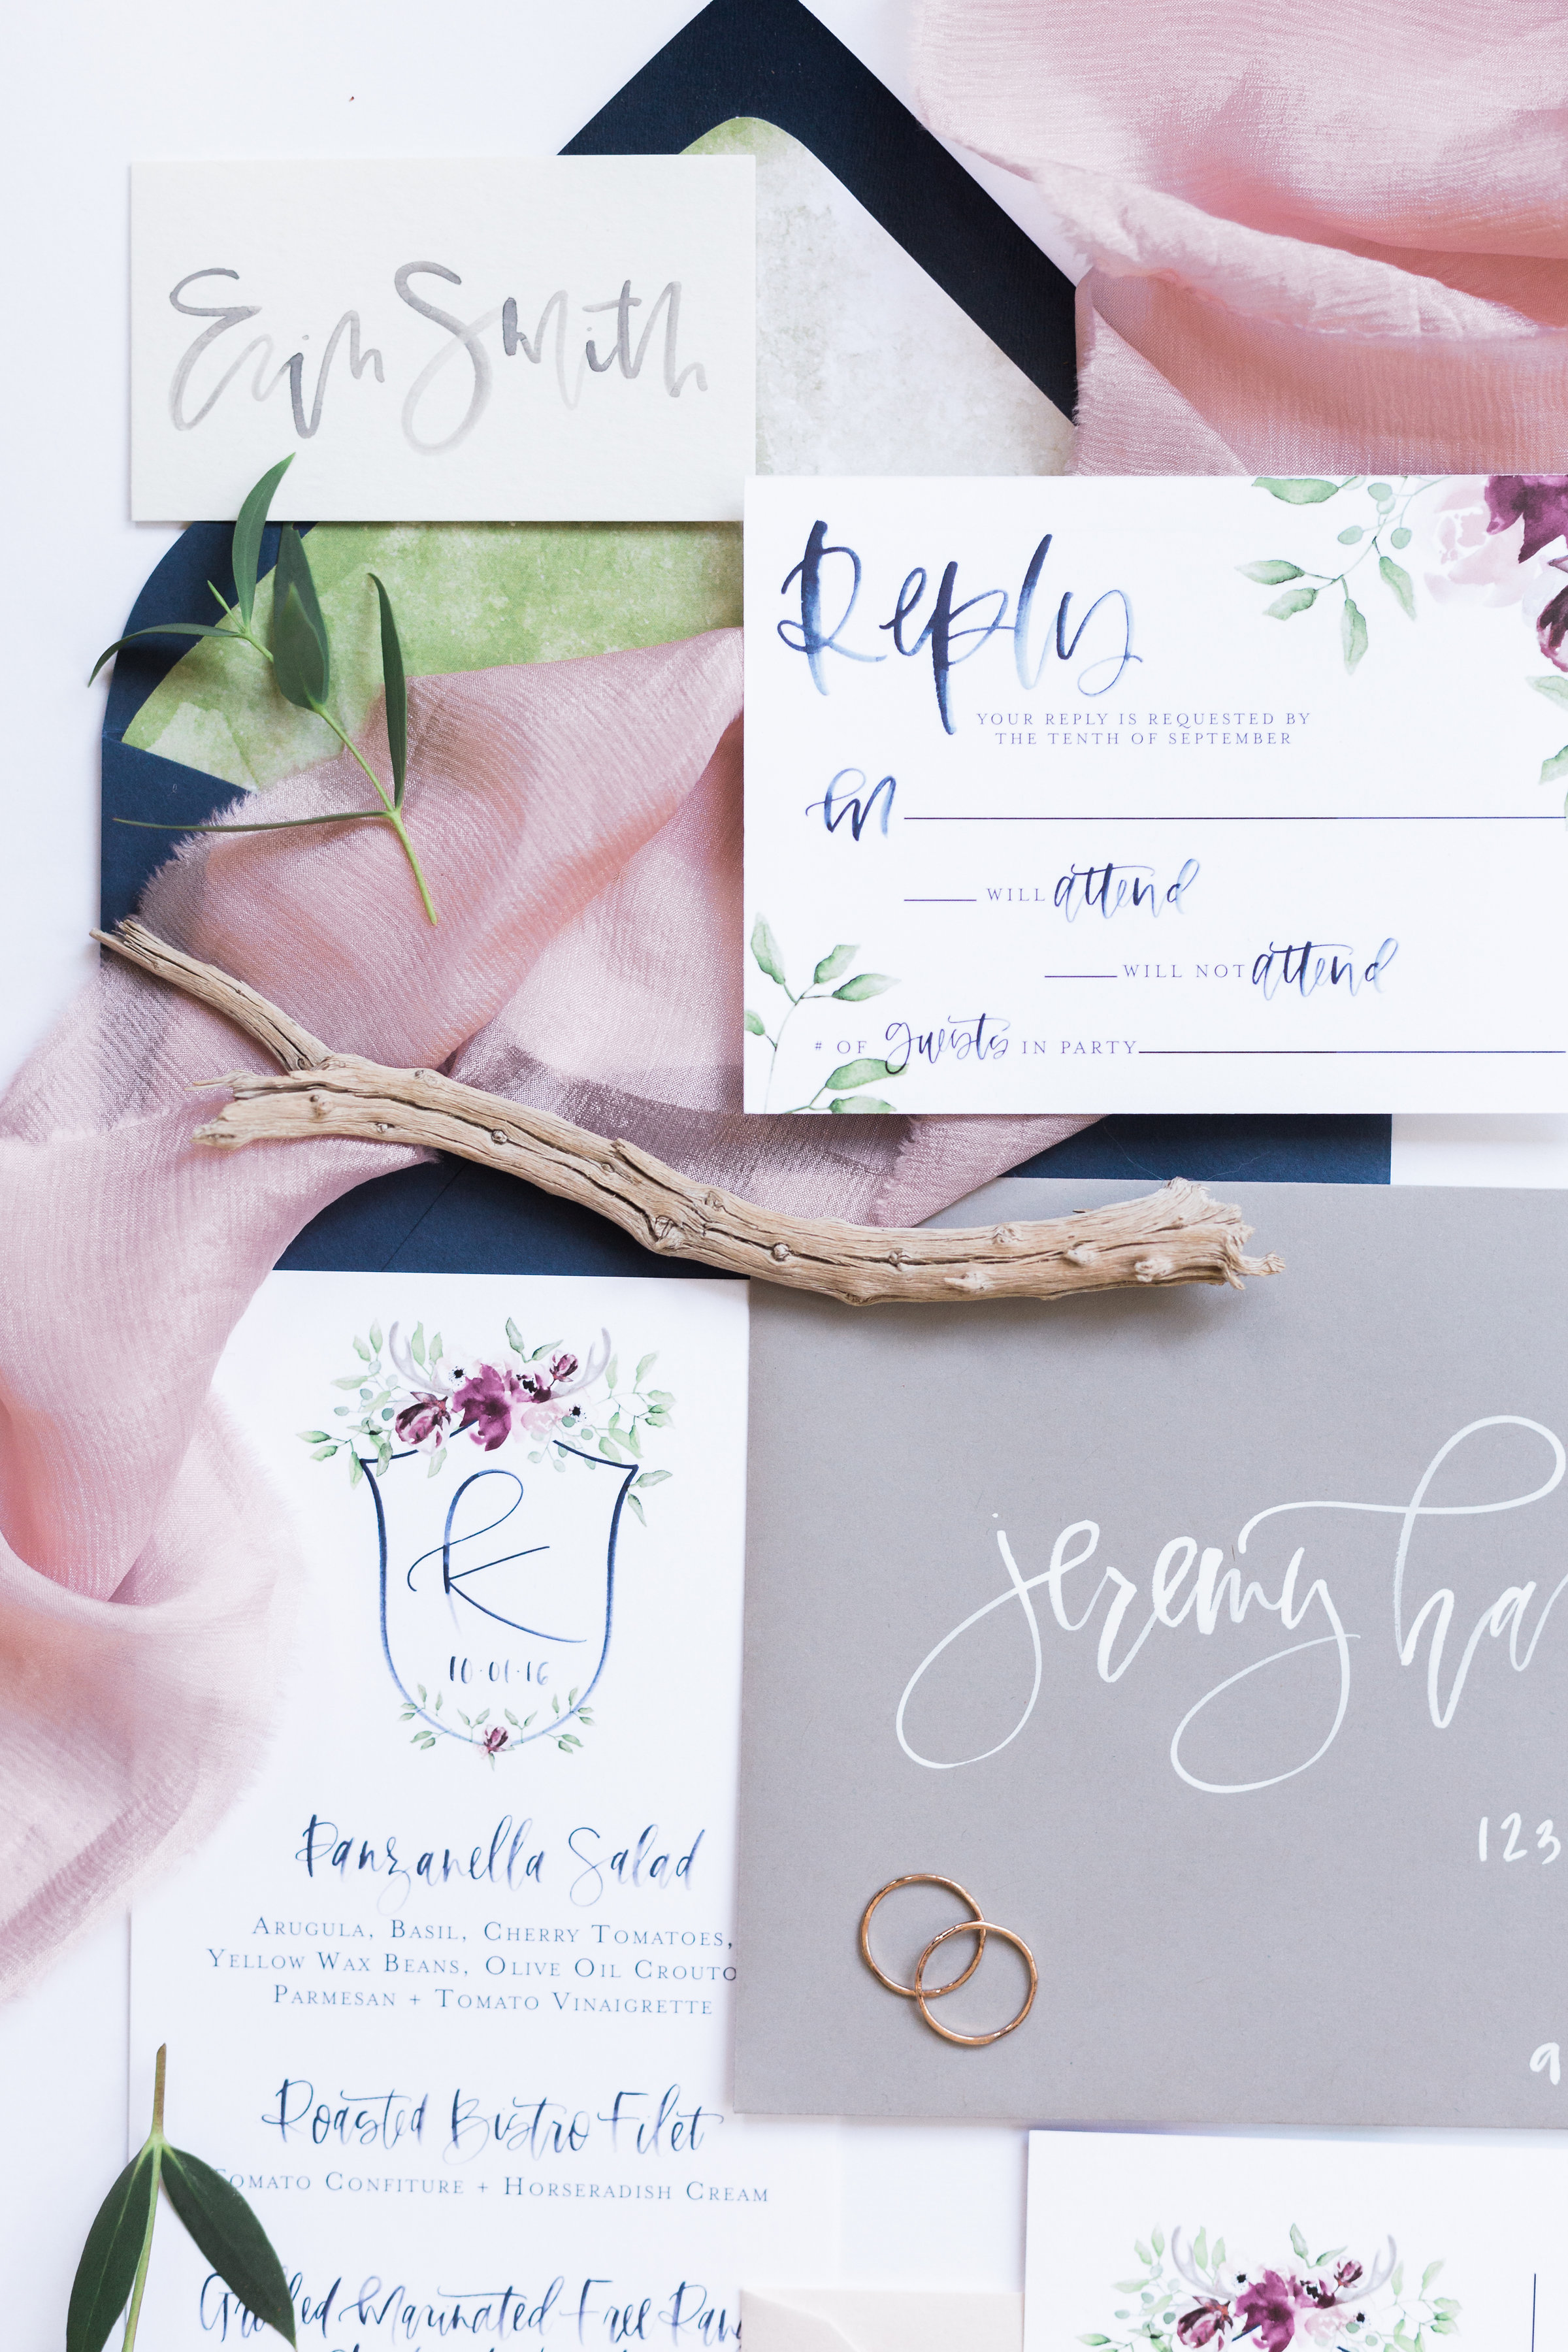
4. I use way more envelopes than necessary in a real life suite. I like the layers it adds as well as color. So once I have my main pieces placed is when I would start tucking in those extra pops of color. You can also do this with place cards or small flat cards.
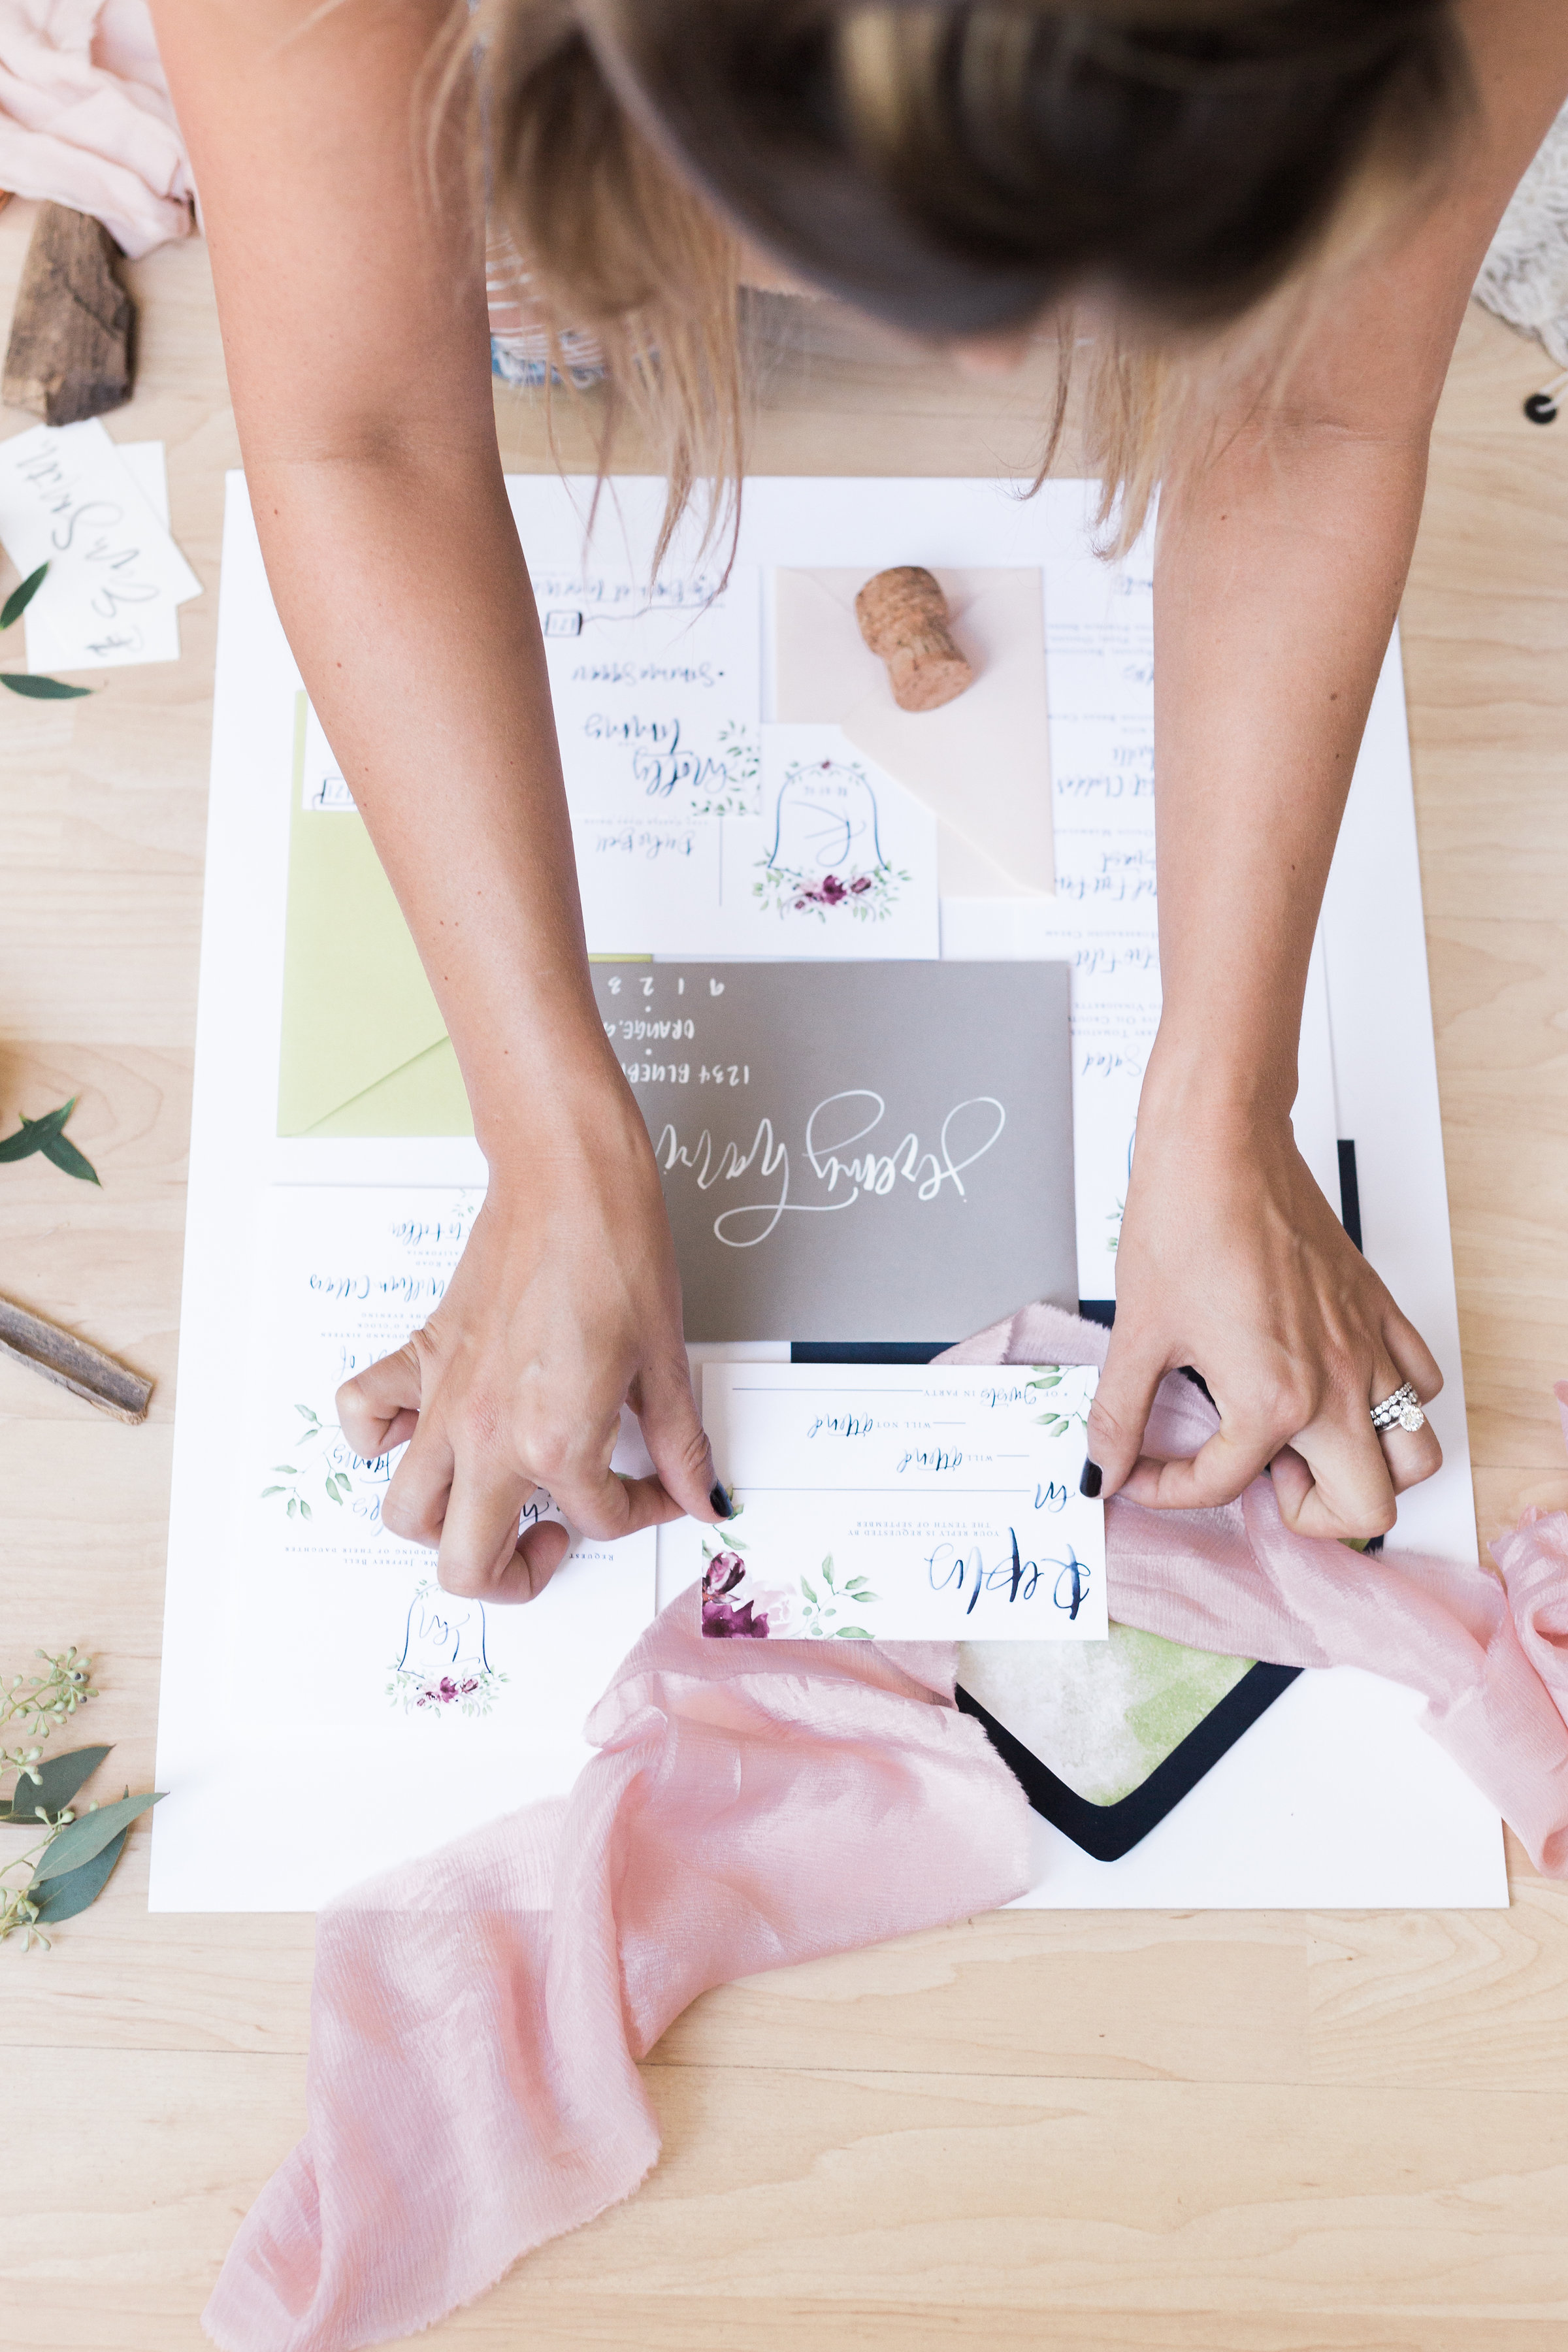
5. Finally, I tuck in pieces to create movement and break up the hard lines that the paper has created. I always have ribbon, small branches or flowers, corks, rings and scissors. The key in making these extra items work is ensuring they make sense in the image. These items should also be consistent in height. I try to steer clear of anything more than an inch or two higher than your board as it casts shadows and steals the focus from your paper pieces.
This is also the perfect time to balance out your image. Make sure one side isn't heavy in color, hard lines vs. soft curves or "messier" styling vs. rigidly lined up items, and fill in any white spaces that seem empty in comparison.
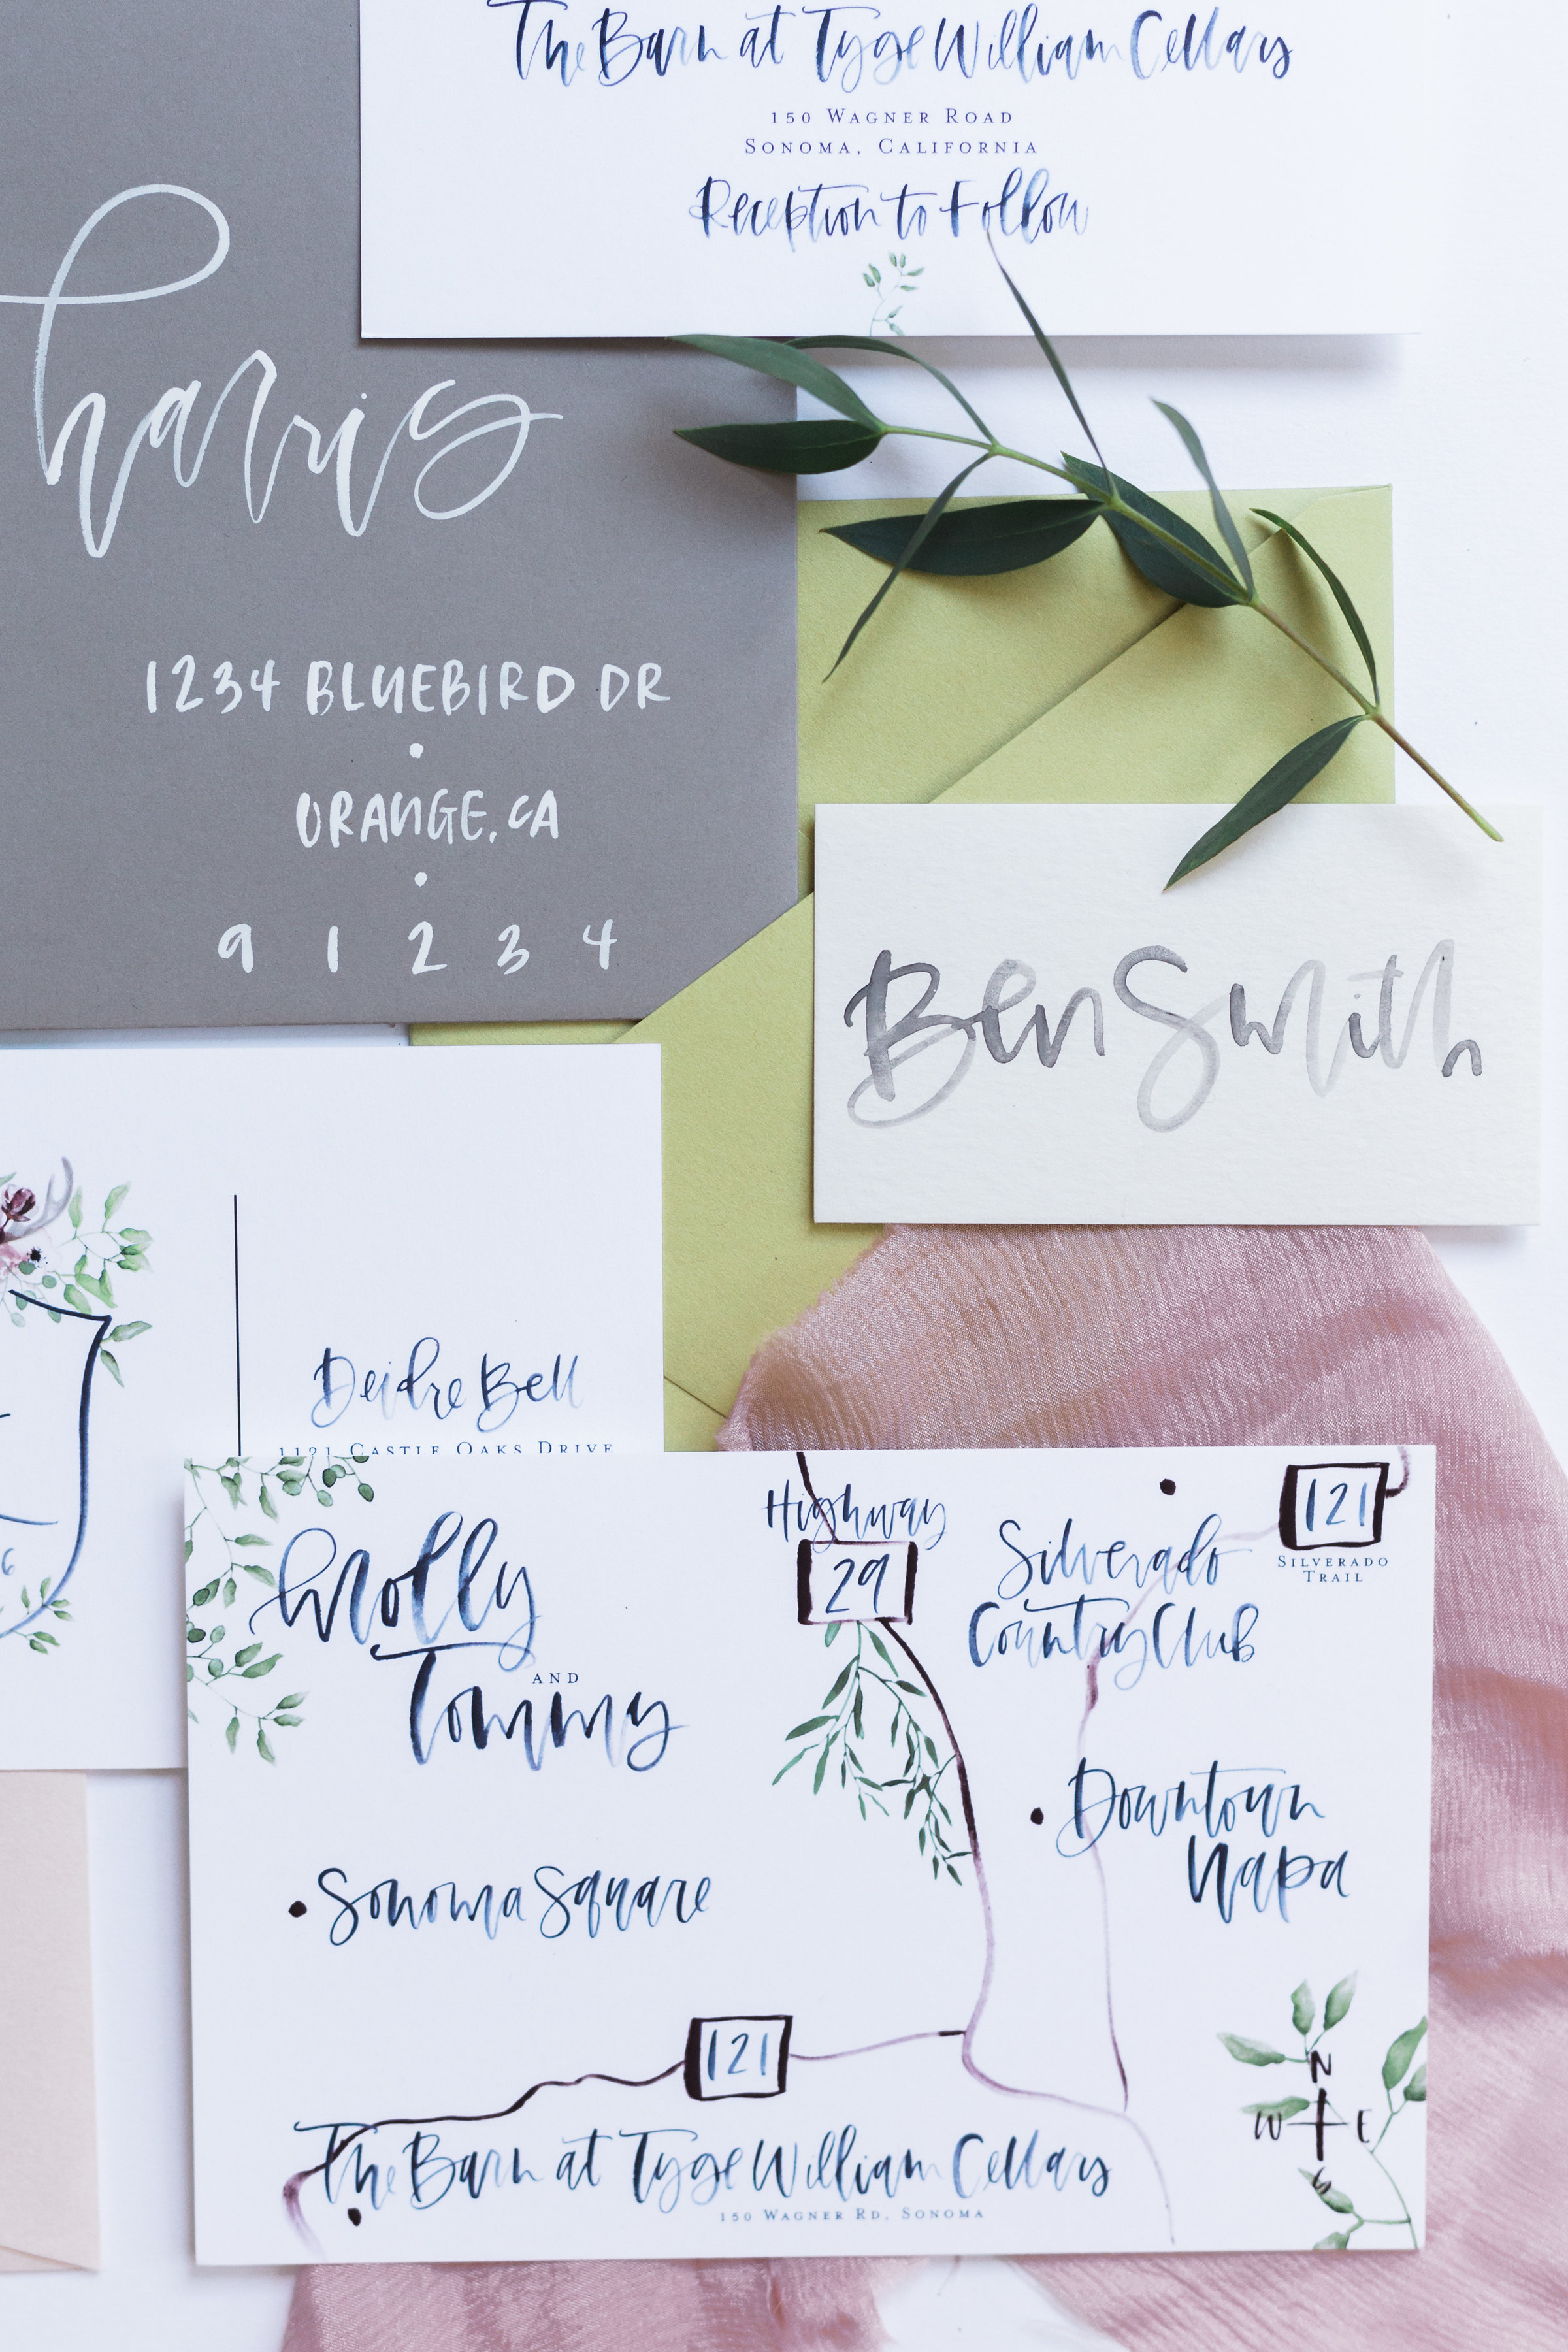

And last but not least... I always create faux envelopes as well as cover up (all or at least majority of) any personal addresses that were on printed pieces. I know I wouldn't want my address floating around on the internet so I think it's best that we take the same care with our clients.
That's it! Typically the process can take anywhere from 5 to 20 minutes... depending on how serious I am about it that day. Some suites just flow and others take a bit more planning to get all of the pieces to fit together like a puzzle. Hope this helps some of you looking for a few tips to take pictures of your own wedding suite or stationery!
Images by Sunny Kim