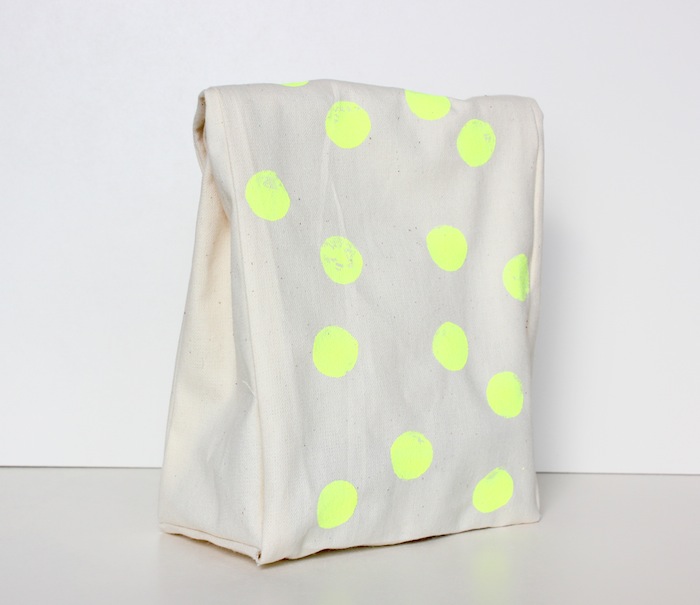
[sack lunch]
those days are long gone of taking your lunch to school in a brown paper bag. that was fun though right?
i don't need to take my lunch many places any more, working from home and all. but there's plenty of situations i can see this little guy coming in handy. so let's get to it and make a really cool lunch sack;)

what you'll need:
- thicker, canvas like material
- hem tape
- paint
- wine cork
- sew-on snap
tools:
- iron
- scissors
- needle & thread

cut 3 pieces from your fabric.
- one piece that is the front, bottom gusset, and back of bag (24" long x 7" wide)
- two pieces that will be the sides of your bag (10.5" tall x 4"wide)
The finished measurements of my bag were
6" wide x 10.5" tall with a 3" gusset (sides and bottom)
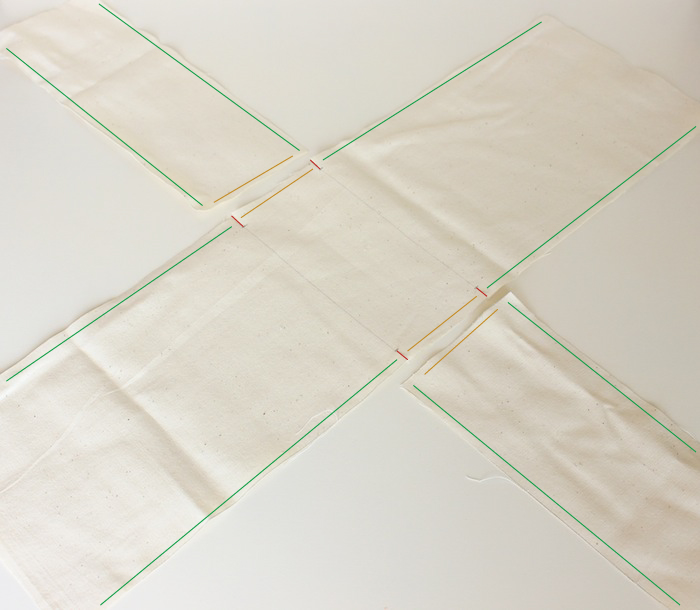
ok. listen closely.
i color coded the lines in the image above to show where all these pieces come together
the red: cut in 1/2" here
orange: fold both pieces in 1/2" and attach face to face (you are looking at the INSIDE of the bag above)
green: fold in and attach face to face
Place hem tape in between the two pieces you are attaching on the face (outside), press with your iron and create the seams
here is what it will look like when you attach the 2 sides marked above in orange.

and below is both of the bottom seams attached along with one of the side seams.

iron all sides together with your tape and you'll have a fancy little bag like this.


now we'll sew on the snap.
Fold the top of your bag down twice to determine where you want your bag to be when it is closed.
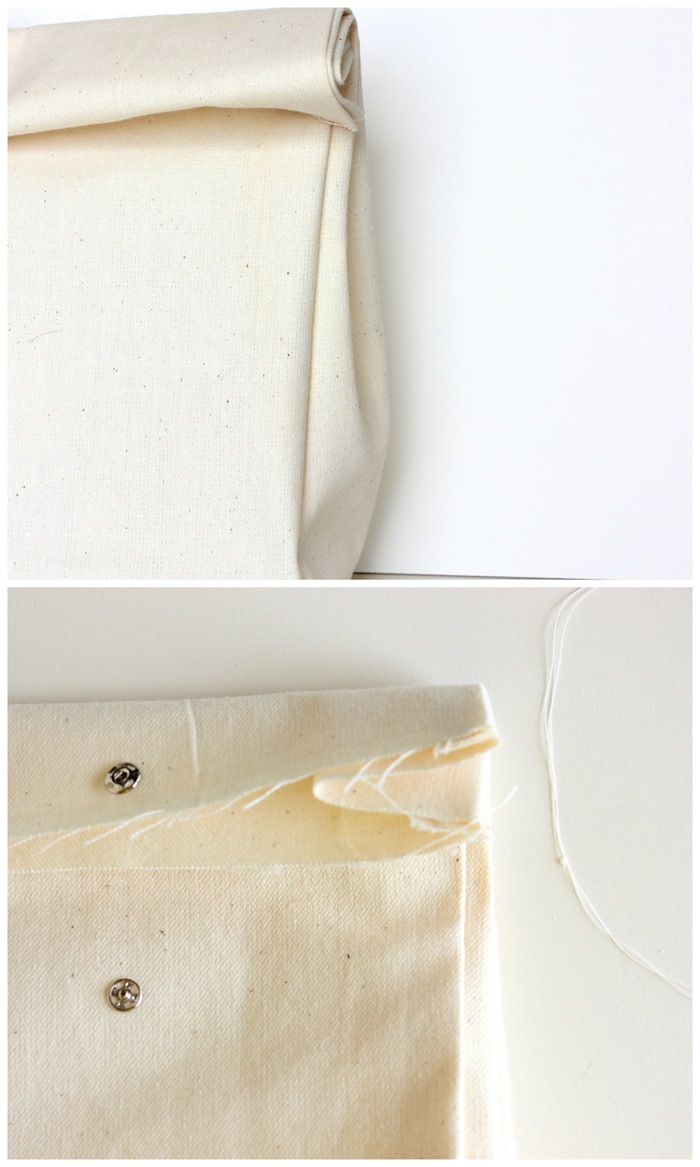
Roll the top of the bag up once and sew on your snap to corresponding spots on your bag.
Now the fun. EASY part.
pour a little paint on some wax or parchment paper, dip your cork and polka dot to your liking.

voila. a lovely lunch sack for road trips, running errands, or to use to contain junk you need a pretty hiding place for;)